-
-
products
-
resources
-
support
-
company
-
Networking between Windows XP and Windows 7
By Steve Horton October 18, 2013No TagsNo CommentsNetworking one computer to another in your home or office may seem like an intimidating task upon first glance. Don’t let the technical jargon confuse you. Here we will discuss the simplest way to network your Windows 7 device to your Windows XP device. Once you set up your system, you will be able to share and access files, share printers and other hardware, and stream media between computers with ease.
Make Sure All Computers are Part of the Same Workgroup
- Name your networking system WORKGROUP and make it the default network name for each PC. That way it will be easier to verify each computer is seeing its counterparts.
- On your XP system, click Start and right click My Computer.
- Next click Properties. This should display the window below.
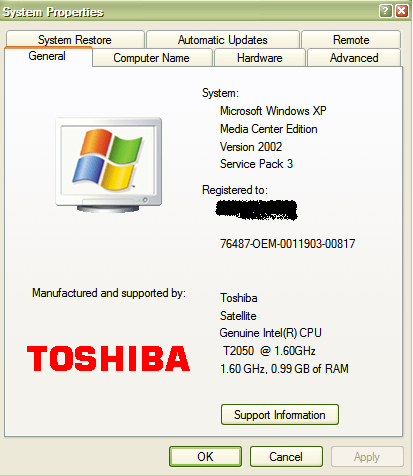
System Properties - Now on the top of this window, click the Computer Name tab.
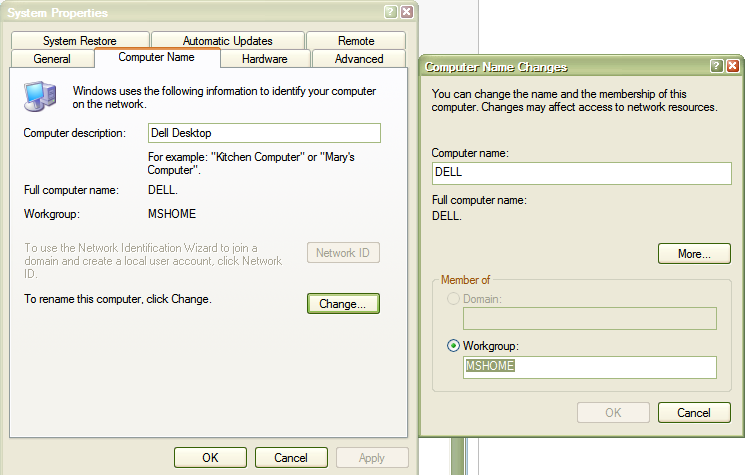
Computer Name - Where it says WorkGroup, change the name from MSHome to WORKGROUP.
- This will ensure your Windows XP Workgroup network name is the same as your Windows 7 Workgroup name.
- Click OK in the dialog box. You will be prompted to restart your PC. Allow the PC to restart.
- If you have more than one Windows XP, repeat this process for all XP PCs.
- Restart all PCs.
Instructions on how to Share Files and Hardware Between Windows XP and Windows 7 PCs
- On your Windows 7 device, click Start and click Control Panel.
- Next Click All Control Panel Items and Network and Sharing Center.

Network and Sharing Center - Then Click Change Advanced Sharing Settings.
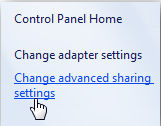
Change Advanced Sharing Settings - Verify all the settings for advanced settings match the window below:
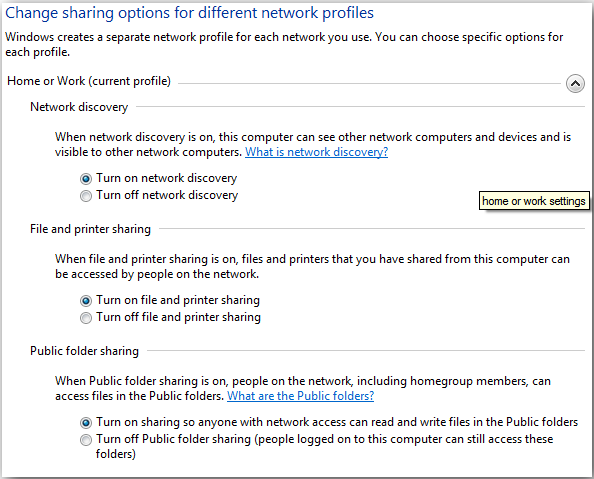
Turn On Network Discovery - Verify in Advanced Sharing Settings that you have turned off password protection. This way you will not be prompted to use a password to enter the system with your other PCs.
- In your network and Sharing window on your Windows 7 machine, you should see your other devices, including those running XP.
- To share other devices such as a printer, on your Windows 7 device, click Start. In the Start menu, click Devices and Printers.
- Your default printer should appear with a green check mark next to it. Click the printer and then click Customize your Printer.
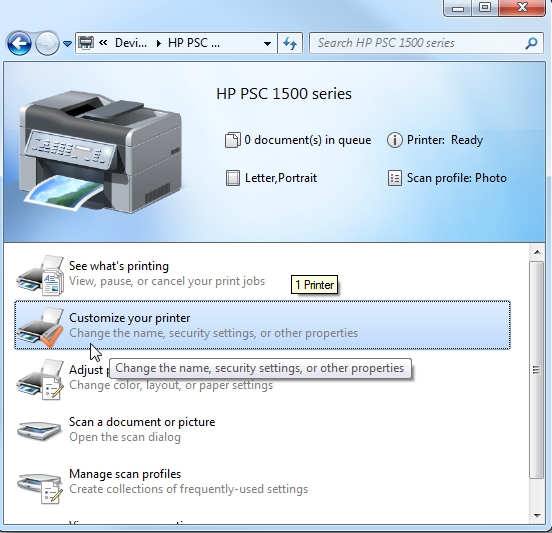
Customize your Printer - The Properties screen will appear, and this is where you will select Share Printer.
- In this screen you will also be prompted to name the printer. Name it so that you will recognize the printer when you enable sharing on your XP device.
- In the Network Sharing window on your Windows 7 device, you will now see your printer. It will also be placed in the Users share folder below.
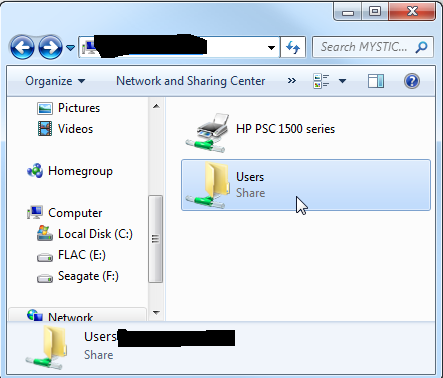
Users - On your XP machine, open your My Network Places. You will now see your Windows 7 device share folder. Click the share folder and you will see the printer you just shared.
Share a Printer
- On XP you will now go to the Start menu, go to Control Panel, click Printers and Faxes, and click Add a Printer.
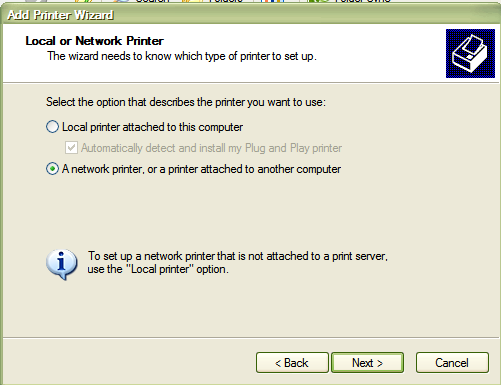
Add a Printer - In this window make sure you click Add a Network Printer. Click Next.
- A window will then appear with the printer you named and shared in an icon box. Make sure to select the shared printer and click Next.
- A warning message may appear stating you are about to connect to a shared printer. Click OK.
- The Printer Wizard Complete window will now appear. Click Finish.
Congrats! You should now be all set to use your printer and share files on your networked devices!
Was this post helpful?YesNoFree Driver Updates
Update your drivers in less than 2 minutes to enjoy better PC performance - Free.
Free Driver Updates
Update your drivers in less than 2 minutes to enjoy better
PC performance - Free.
Didn't find your answer?Ask a question to our community of experts from around the world and receive an answer in no time at all.most relevant recent articles Pin It on Pinterest