-
-
products
-
resources
-
support
-
company
-
A Guide to the KERNEL_DATA_INPAGE_ERROR Blue Screen of Death
By Steve Horton May 17, 2013Blue Screen of Death, bsod, kernel_data_inpage_error106 CommentsError Name: KERNEL_DATA_INPAGE_ERROR
STOP Code: 0x0000007a
The KERNEL_DATA_INPAGE_ERROR Blue Screen of Death occurs whenever Windows has trouble reading something kept in the memory properly. This can apply to both kinds of memory: stored memory on your hard drive, but also dynamic memory in your RAM, which is usually what technicians refer to as “memory”.
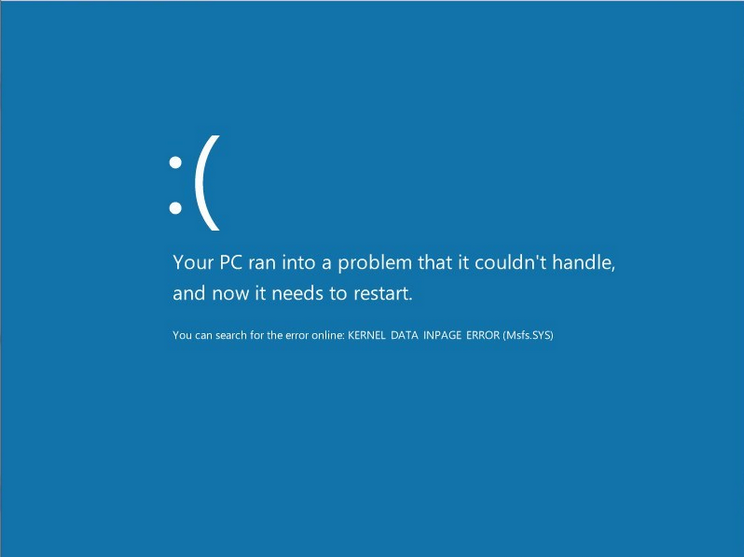
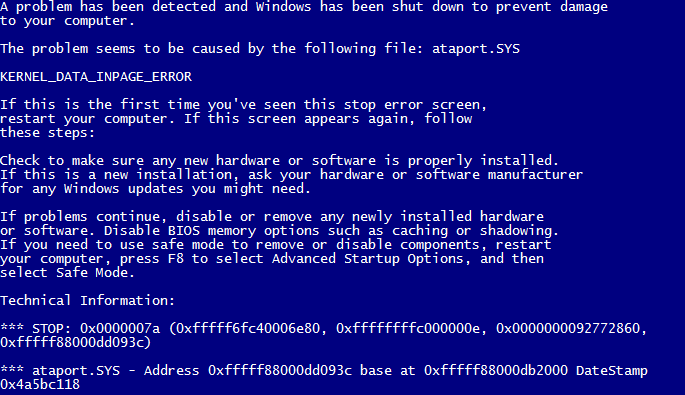
Fortunately, this one has two very simple solutions, and if they don’t work, you simply have defective hardware. The solutions are below, but first, I’ll give you a few screenshots of what this error should look like.

This error as seen in Windows 8.
This error as seen in older versions of Windows.The first possible solution is that your hard drive is the one causing the problem. To check if your hard drive is causing the issue in Windows XP, Vista or 7 , open a Windows Search (Windows Key + F), and type in ‘chkdsk’. Execute it — you can’t run a disk check while actively using Windows, but you can schedule it to start automatically the next time your computer is turned on. Wrap up what you need to and reboot — the disk check process can take a very long time, especially on large and/or slow hard drives. Watch some TV, play a game, take a nap … whatever you want to pass the time.
To do this in Windows 8 open Windows search (Windows Key + F) and then type ‘cmd’. Right click on the Command Prompt and choose “Run as Administrator” from the bar at the bottom of the screen. You will need to provide administrator authentication and then the Command Prompt windows will come up. Type the command “chkdsk C: /f /r /x” where ‘C:’ is the letter of the drive you wish to examine or repair. This is most commonly drive “C:” but it may be different in your case.
When the disk check is finished, your computer will automatically reboot. The disk check will fix any problems it encounters in your hard drive — and it likely will encounter some, even if they aren’t the cause of this particular error.
The second possible solution is that your RAM is causing the problem. RAM stands for Random Access Memory, and Windows makes constant usage of it to keep multiple applications running and keep tabs on important system data. To check if one of your RAM sticks is causing the problem, open another Windows Search and type in Memory Diagnostics Tool. What follows is similar to the disk check process — you can restart immediately to check your memory or you can schedule it for the next time your computer is on. Save what you need to and run the Memory Diagnostic.
After both of these processes are finished, you should be able to determine what’s causing the problem. If the Memory Diagnostic doesn’t flag any problems with your RAM, then your hard drive is the culprit. If, however, it does find issues, it means you have defective RAM that needs to be removed or replaced.
If using a laptop — or you simply don’t know how to replace RAM — call your manufacturer or a technician to help you from here. You’ve done your part.
Was this post helpful?YesNoFree Driver Updates
Update your drivers in less than 2 minutes to enjoy better PC performance - Free.
Free Driver Updates
Update your drivers in less than 2 minutes to enjoy better
PC performance - Free.
Didn't find your answer?Ask a question to our community of experts from around the world and receive an answer in no time at all.most relevant recent articles Pin It on Pinterest