-
-
products
-
resources
-
support
-
company
-
Top 5 Things to Know about Driver Reviver
By Steve Horton February 20, 2013Driver Reviver, Drivers, ReviverSoftNo CommentsOnce you purchase Driver Reviver, it does a fantastic job of scanning your PC and updating all its drivers. That’s not all that our product offers, though. We’d like to show you a short top 5 list of what you need to know about Driver Reviver.
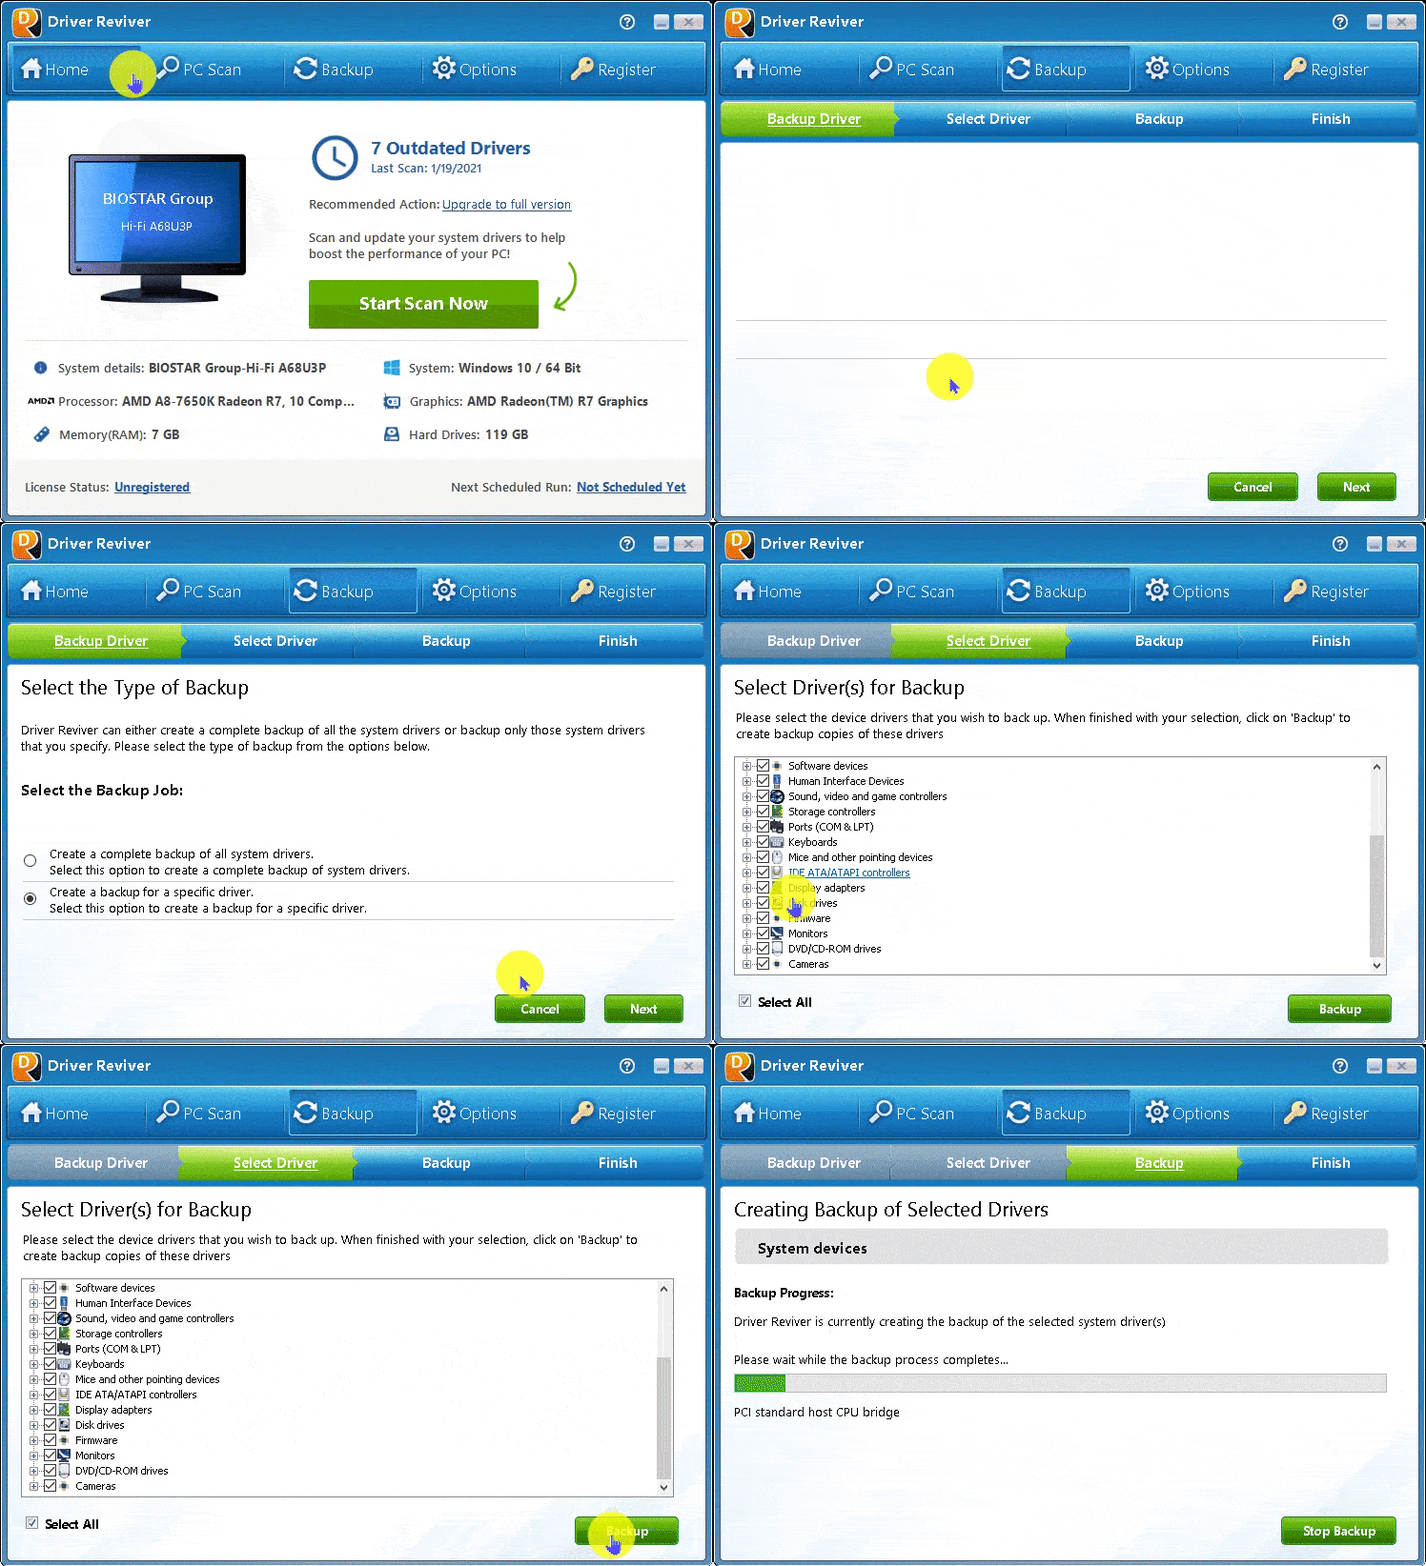
1. System Driver Backup
Click the Backup (double arrow) icon. Then, click Start Backup to back up your PC’s entire suite of drivers. This is useful to run first, in case something happens during the driver update process. You can back up all your drivers, or only specific ones.
2. System Driver Restore
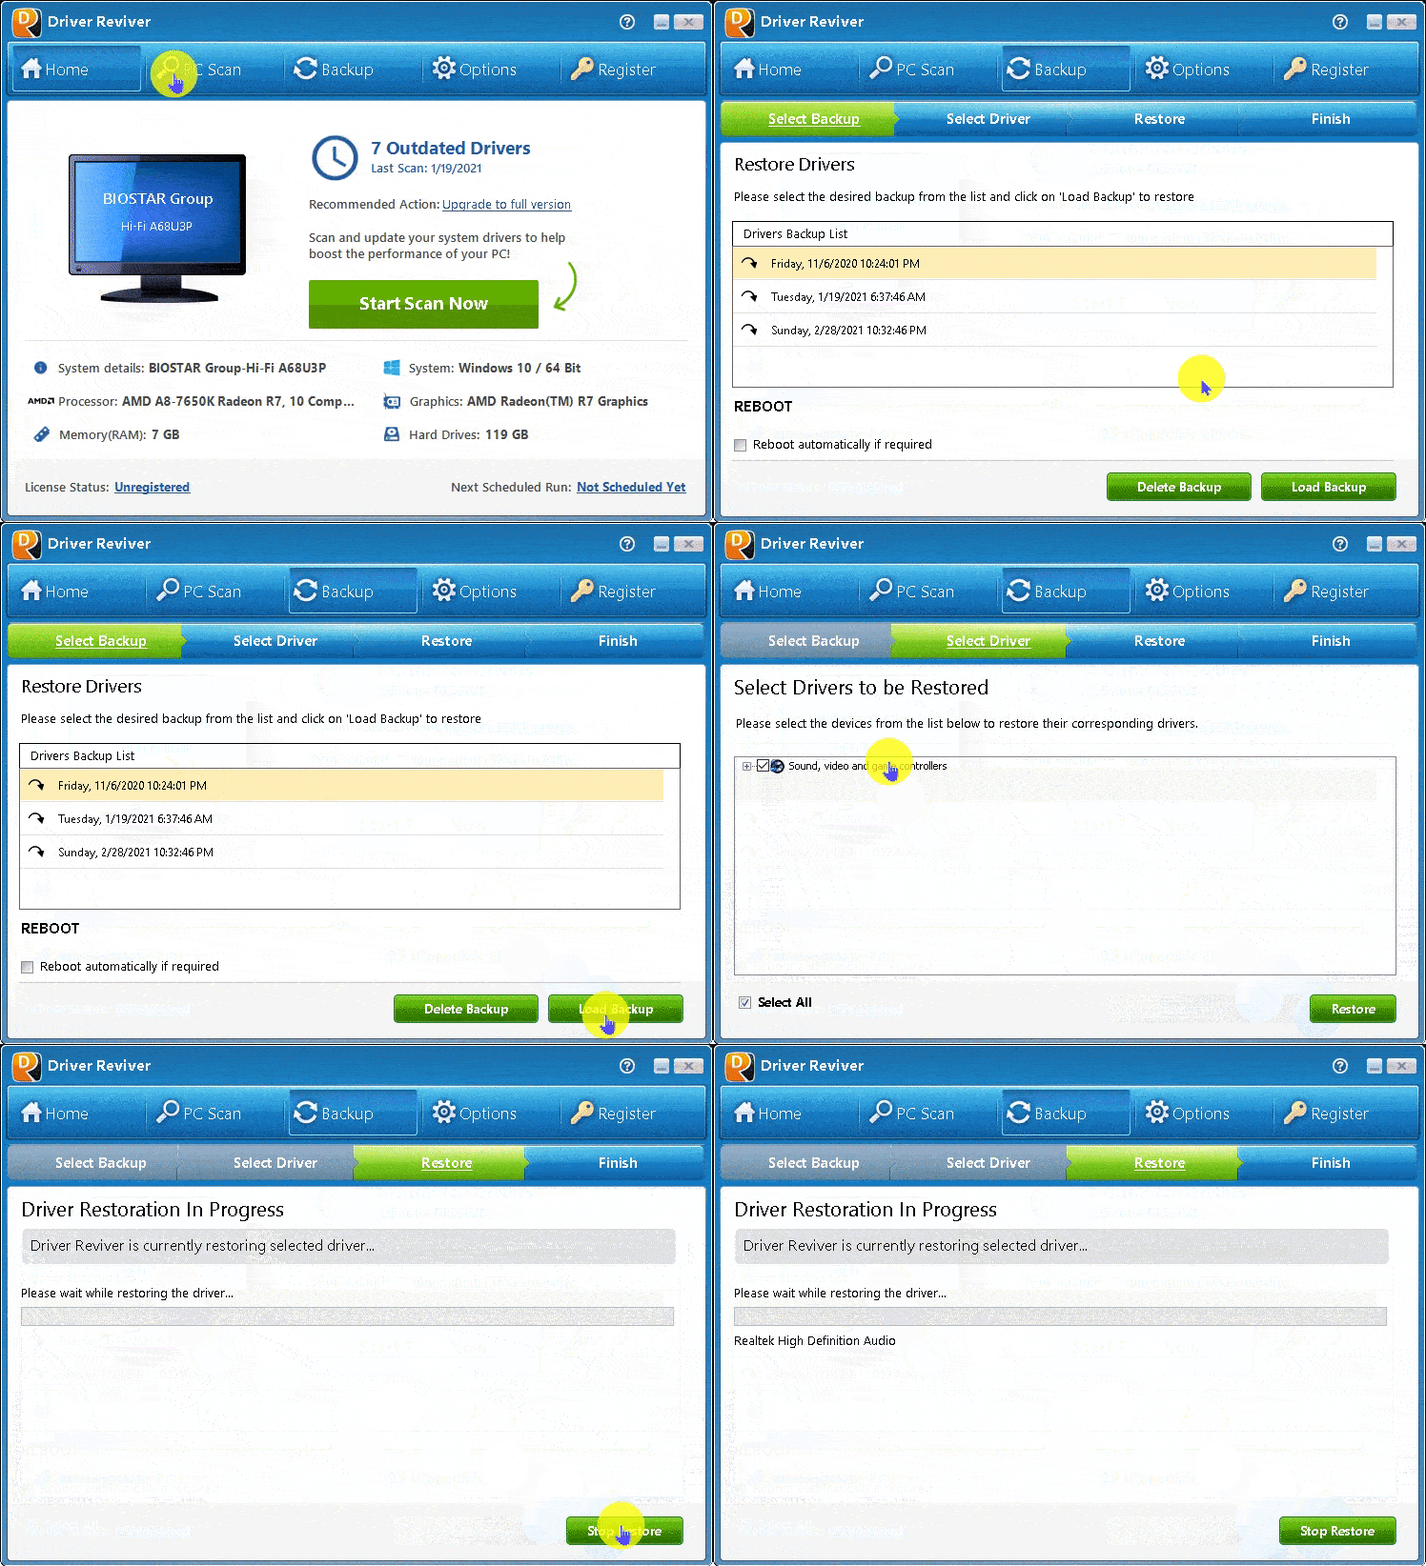
Click the Backup (double arrow) icon. Then, click Start Restore. This will restore some or all of your backed-up drivers from the backup you created earlier.
3. Automatic Scans
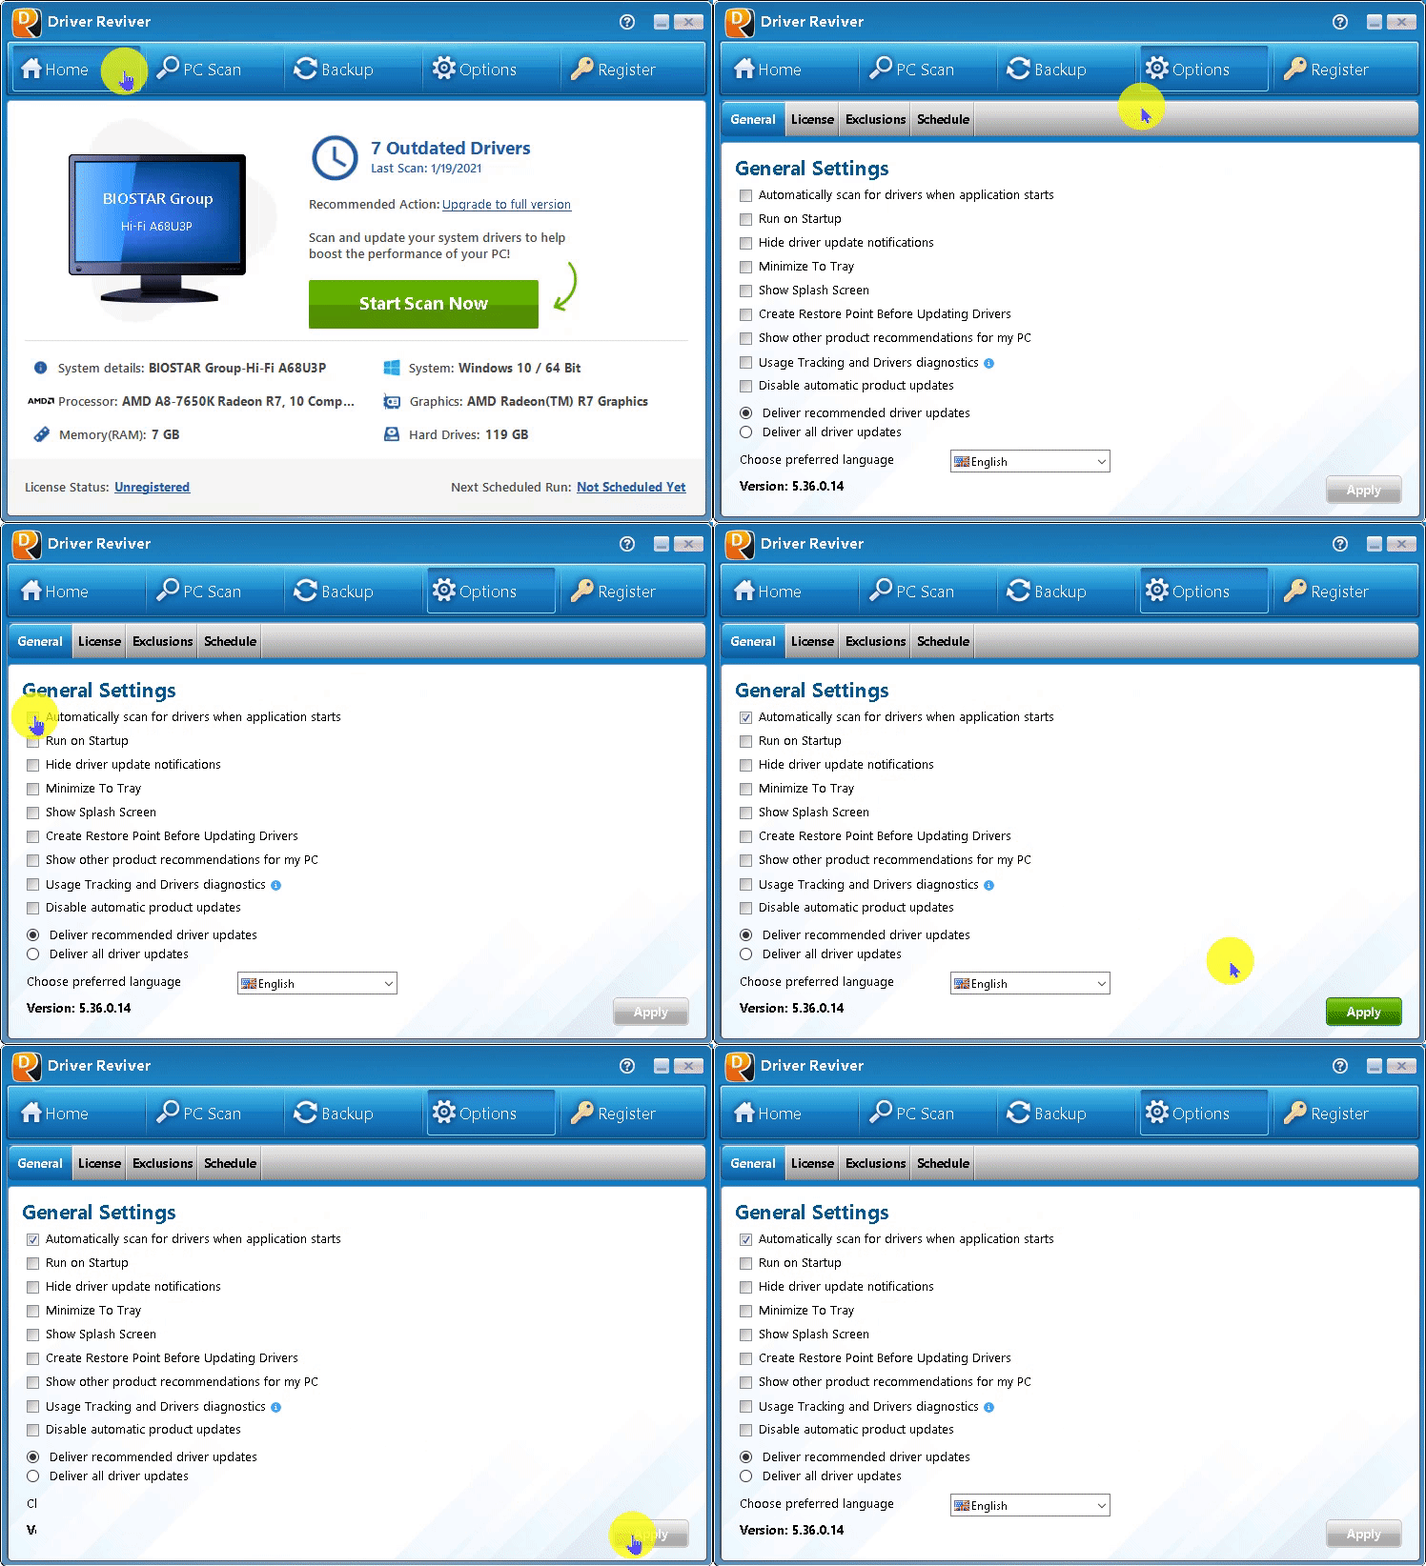
Decide when Driver Reviver should run.
Click the Options (gear) icon. Click the General tab. Under General Settings, you can set up automatic scans each time Driver Reviver is launched, or decide to launch it manually (which is the default.) You can also choose if Driver Reviver runs when you start your computer. This option is turned on by default.
4. Schedule Scans
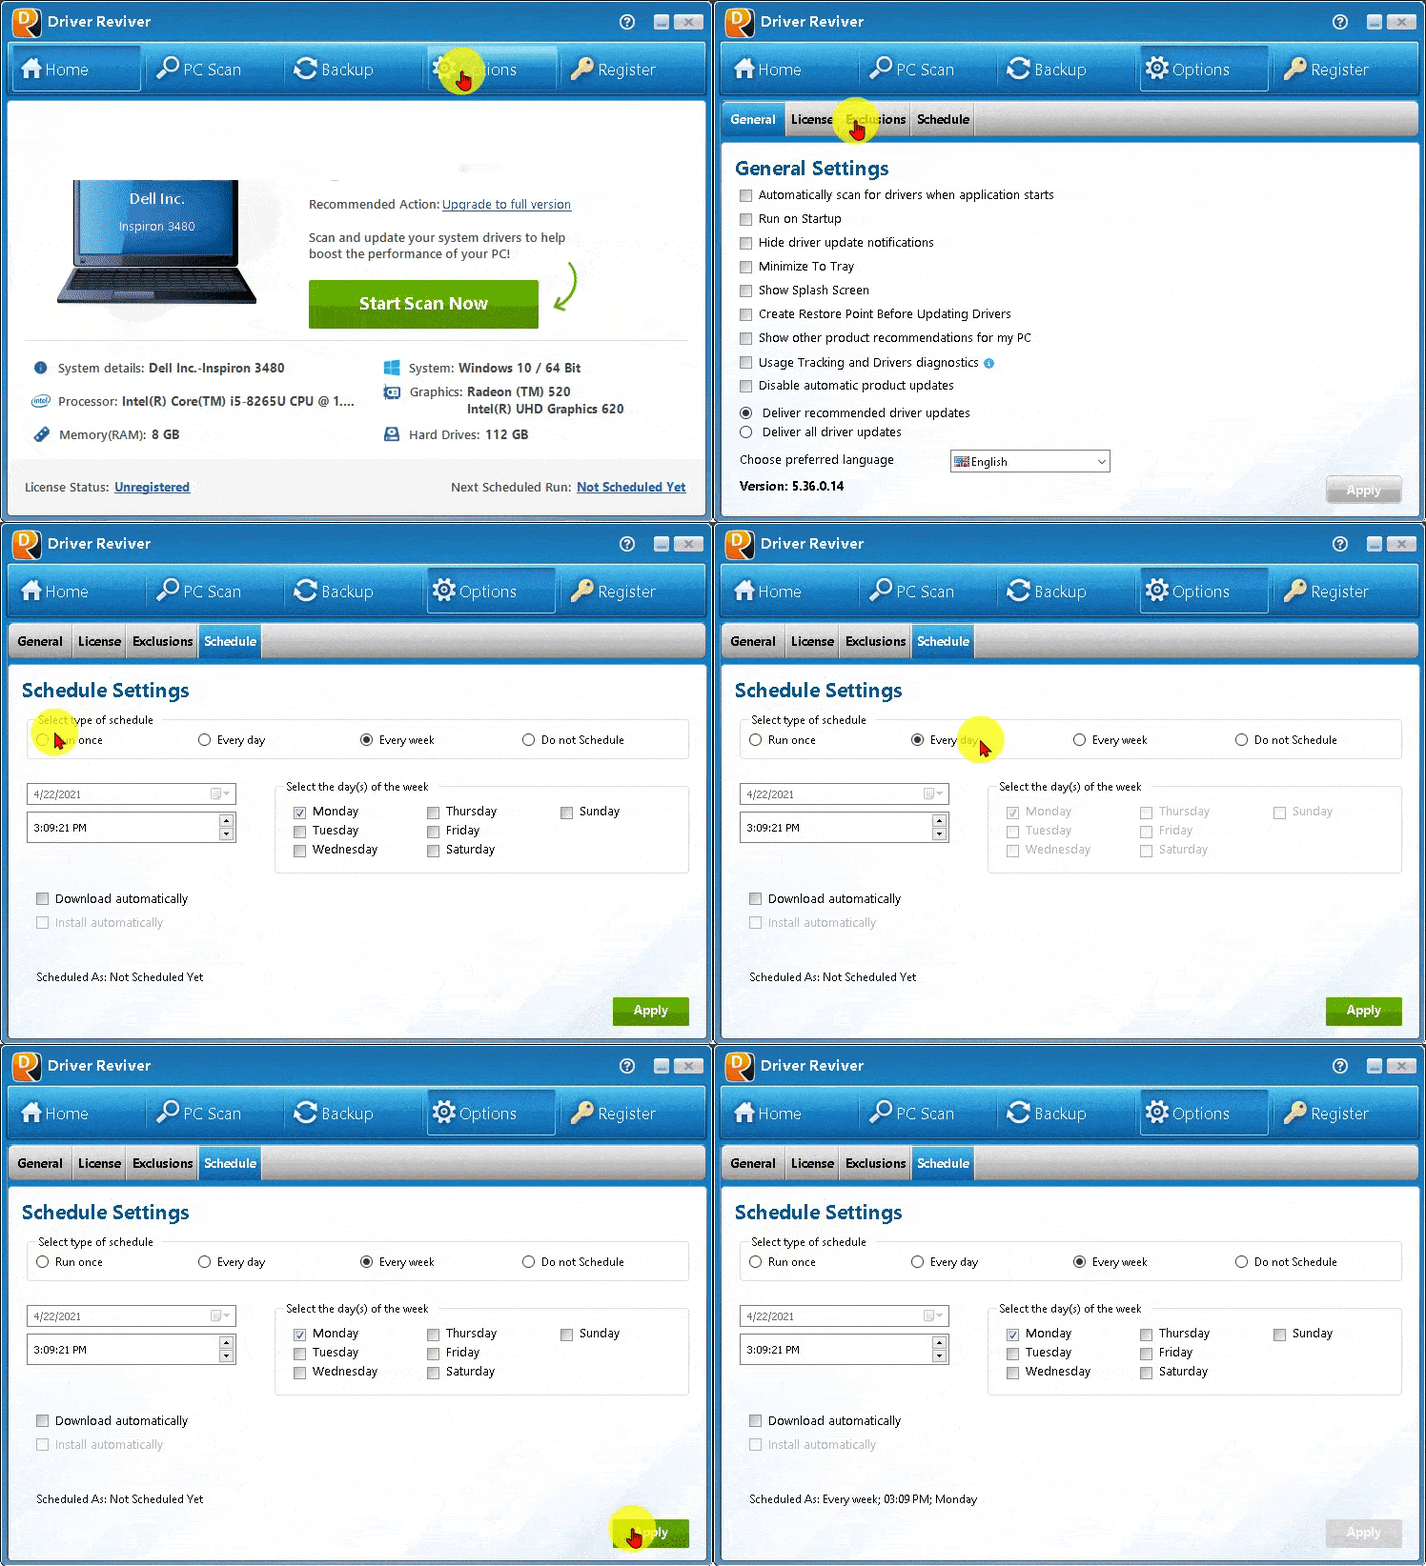
Choose how frequently you’d like to run scans.
Click the Options(gear) icon. Click the General Settings tab. Under Schedule Settings, choose whether you want to run the scheduled scan once, every day, every week, or not at all. Then, choose a date and time, or a day of the week, then click Apply to set up your scheduled scan.
5. Driver Exclusions
Unfortunately, some drivers may cause issues when they’re updated. Though rare, some updates can create incompatibilities with your system.
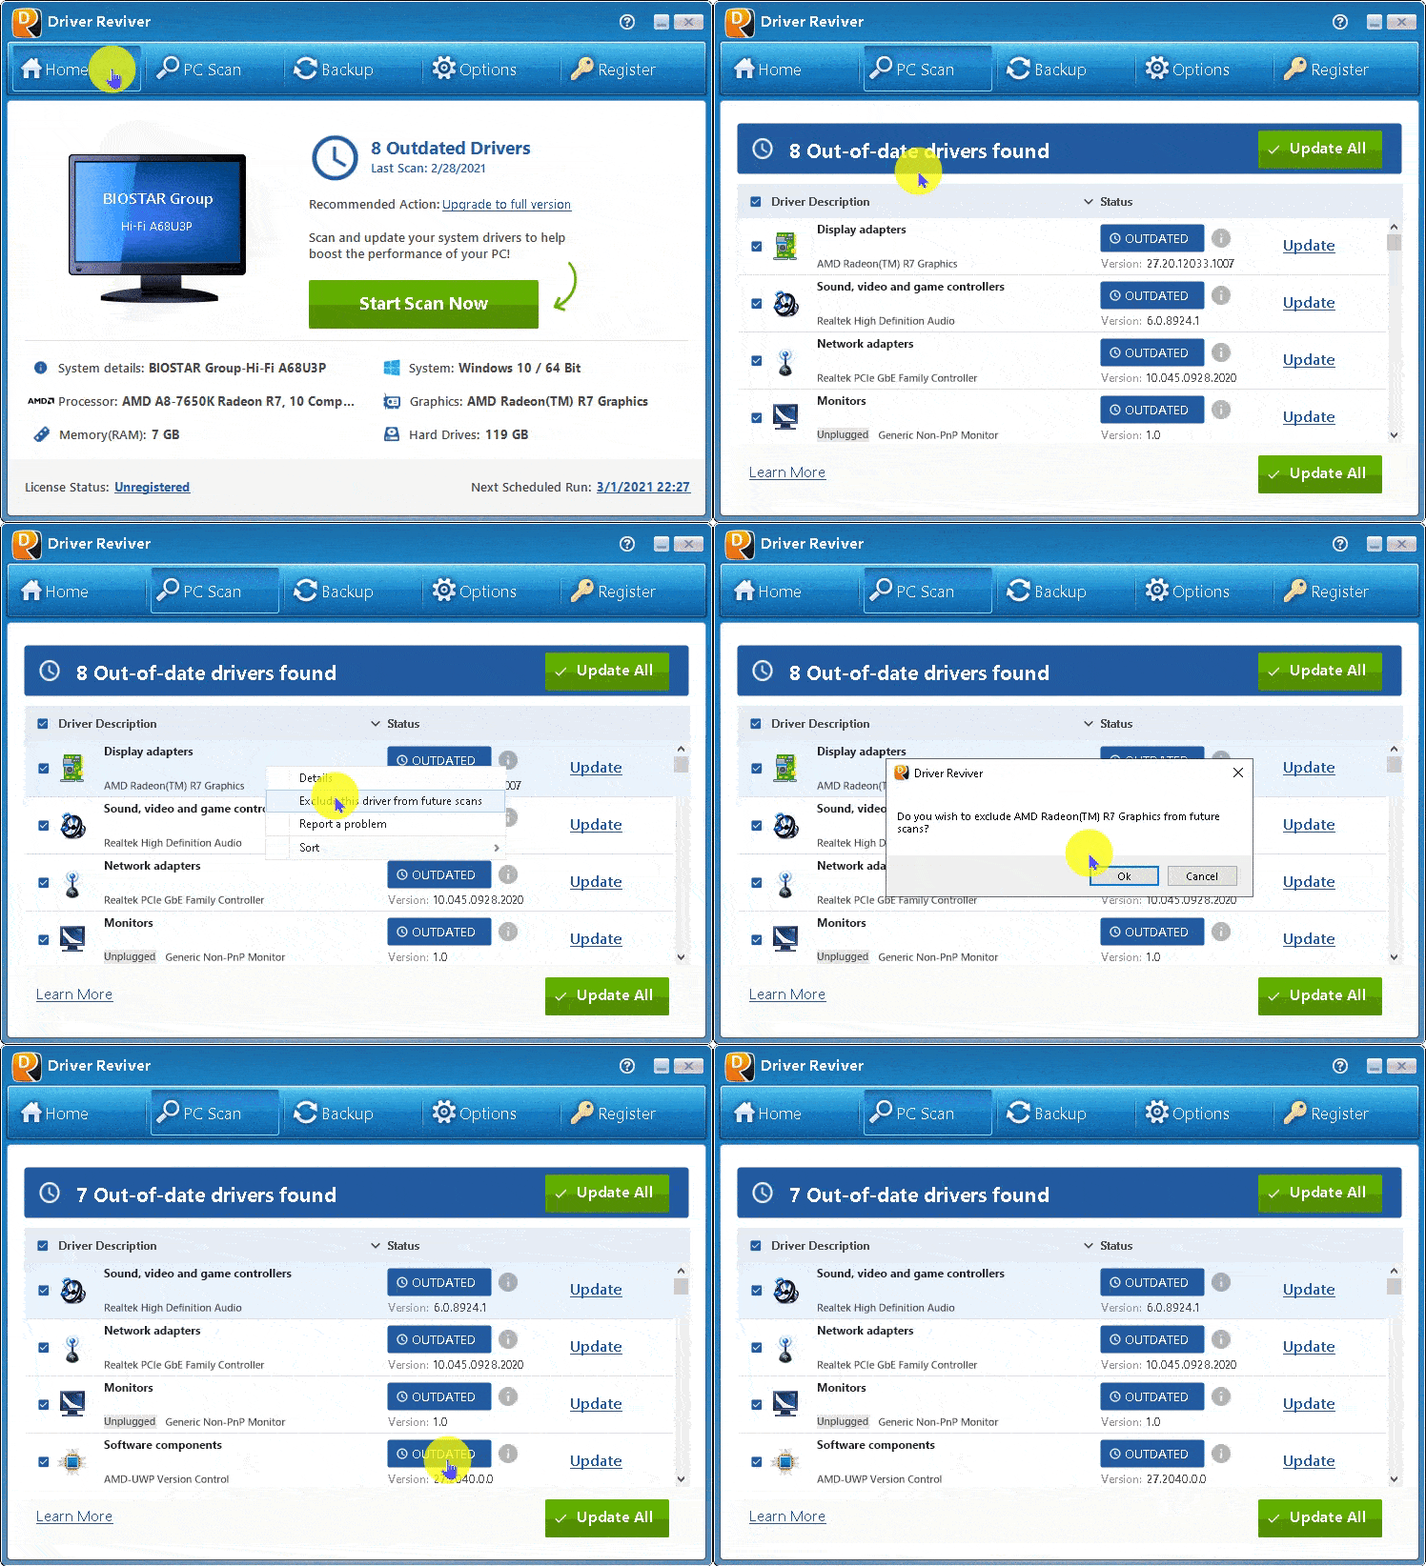
You can exclude drivers that shouldn’t be updated from future scans by adding them to the Driver Exclusion List.
Navigate to the Scan Results page after completing a driver scan. Find the unwanted updates in the results list, and right-click on each one to choose the option, Add Drivers to Exclusion List. They will be excluded from updating during your next scheduled scan.
To remove a driver from the exclusion list, go to Settings and then Driver Exclusion to see your Driver Exclusion List. Then, select the driver(s) you wish to update and click on Remove Item, or, if you want them all updated, click on Remove All Items. They will then be included in future scans.
We’ve got more tips to help you improve and optimize your PC. Click here to manage your subscription options, and make sure you’re signed up for our Tips & Tricks newsletter.
Thanks again!
The ReviverSoft Team
Was this post helpful?YesNoFree Driver Updates
Update your drivers in less than 2 minutes to enjoy better PC performance - Free.
Free Driver Updates
Update your drivers in less than 2 minutes to enjoy better
PC performance - Free.
Didn't find your answer?Ask a question to our community of experts from around the world and receive an answer in no time at all.most relevant recent articles Pin It on Pinterest